Candle making at home is easier than most of us imagine. But before we move on to this step, let’s start with a brief history of the candle. The history of the candle, which was used as a light source, in religious ceremonies and various celebrations, goes back to 5 thousand years before artificial lighting tools were discovered.
It is among the rumors that it was invented in Egypt and Crete. It is one of the first inventions of the Ancient Age. In the 1820s, a French chemist, Michel-Eugène Chevreul , found stearic acid by separating the fatty acid from the glycerin in the oil. Quality candles were started to be made with this substance called sterine. In 1834, Joseph Morgan invented a machine and enabled the serialization of candle production.
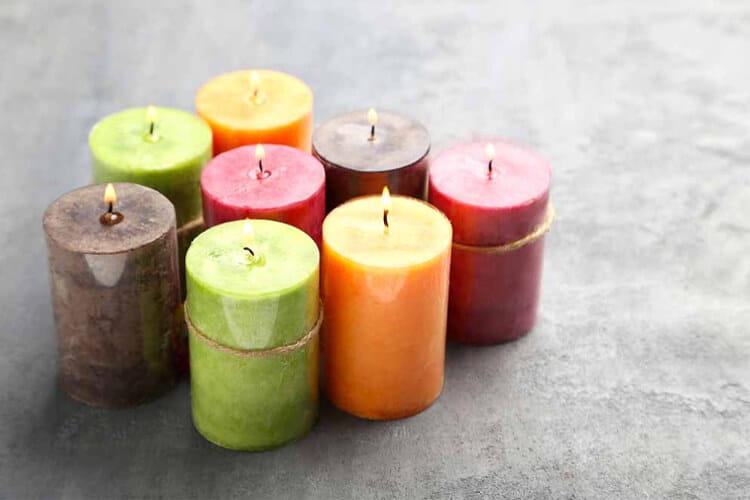
With the sales of bulbs in 1879, the use of candles began to shrink. 21. In the 19th century and later, candles began to be used for decorative purposes in homes. Candle making at home has become quite easy recently and is a candidate for many of us to be a hobby. Due to the pandemic, many people have started to try making scented, colorful and various shaped candles as a hobby at home. In particular, the fact that the materials required for candle making do not have a very high cost has made candle making a trend.
Materials Required for Making Candles at Home
Although there are multiple types of candles, there are basically materials that we need to acquire. These are beeswax, wicks, and a container in which you can pour the wax.
- Wax
- Suppository
- Decorative containers or jars
- Perfume and dye (optional)
- A bowl or pot in which you can melt the wax
Candle making at home can only be done with these simple materials. There are several types of wax to choose from before making candles. The first of these is the most widely used and popular Paraffin wax. It is a kind that can be recommended to those who have just started making candles; because it melts quickly, is inexpensive, easy to color and is naturally scented.
However, due to the high concentration of chemicals emitted during melting, allergic bodies may need to be careful. The second is soy wax. Since soy wax is obtained from soybeans, it is both natural and easier to clean than other types of candles. Soy wax burns more slowly than other candles.
The third is wax. Beeswax is completely natural and cleans the air in the house or its environment. The colorings and various scents do not last very long in the wax. You can use essential oils in beeswax.
Before You Start Making Candles:
Before you start making candles at home, you may want to take some precautions. To protect the area where you will make the candle, you can cover it with a piece of newspaper or a cloth. It is very important that you use a wick suitable for the wax you have chosen; because some wicks do not melt some waxes. The next step is to melt the wax.
Before pouring the wax into the container you want, you need to fit the wick into the container. To fix the wick to the container, it will be enough to pour a little of the wax you melted. The container you will pour may be a glass, jar, heat-resistant flowerpot or decorative molds you have bought that you have not used before.
Choose the Candle Containers You Will Use
The hearts you will use can be completely according to your preferences. You can even use the jars, tea glasses and mugs that you do not use at home, and even heat-resistant ceramic pots as containers. Ceramic and glass are heat resistant materials and you can choose them for candle making.
How Much Beeswax Should I Use?
Although you are thinking of determining the amount you will use by eye, you can definitely measure how much liquid the container you will use takes and then melt the wax in order not to waste the wax. This method will be very practical especially for beginners.
You should definitely choose the size of the wick you will use according to the size of your door and the type of wax. Roving manufacturers provide graphics service for you to use the right size. You can use these online services.
Candle Making Stages at Home
- 1) Melting wax:
Put water in a large pot and start boiling. After the water boils, if you are using a melting pot, you can drop it directly into the boiling water. If you are going to use a heatproof container, place this container on top of the saucepan and add the waxes to this container. Waxes will melt with the steam and heat of the water coming from below. When it melts, it will look like olive oil. To add color and fragrance to your wax, you must wait for it to cool slightly.
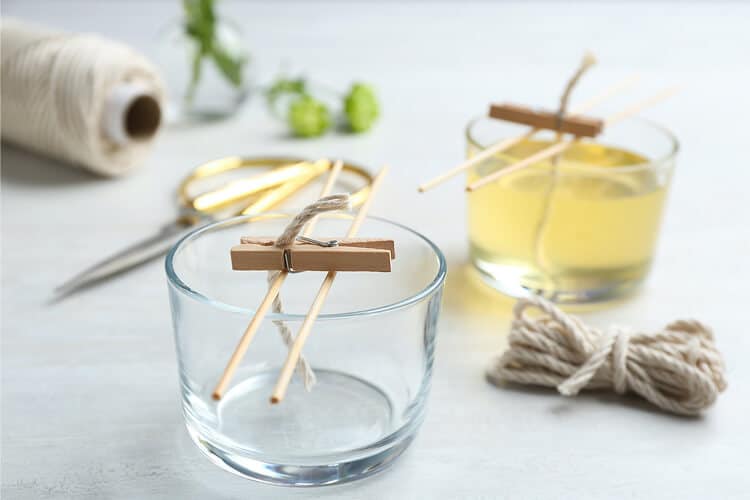
- 2) Select and Prepare Your Containers
While your wax is cooling, prepare the containers you chose earlier. The containers you will use must be dry and clean. In the next step, you should fix the wick you have chosen in the type and length suitable for your wax into the container. Some wicks in the market are self-adhesive, you can fix these wicks directly into the container.
If it is not sticky, you can stick your wick to the container you will use with the help of an adhesive. Another alternative is to drip some of the melted wax into the bowl, place the wick on it, wait for it to dry and set. Do not forget to set the size of your wick to be longer than the container you will use.
- 3) Adding Fragrances and Colors We Want
In this step, we will add the scents we want or the colors we want into the wax we melt. You can add 5-6 drops of the vegetable oil of your choice to your melted wax. Then you can add the color you want according to the intensity you want. You can mix the wax with a spatula for a while, and if the color is not as intense as you want, you can add a little more food coloring.
If you do not fully understand the color intensity of the wax, you can wait for it to freeze by dripping a drop of the melted wax on a cold floor. After the drop dries, the color intensity will be clearer. If the color intensity is still not what you want, you can add a little more food coloring to your melted wax.
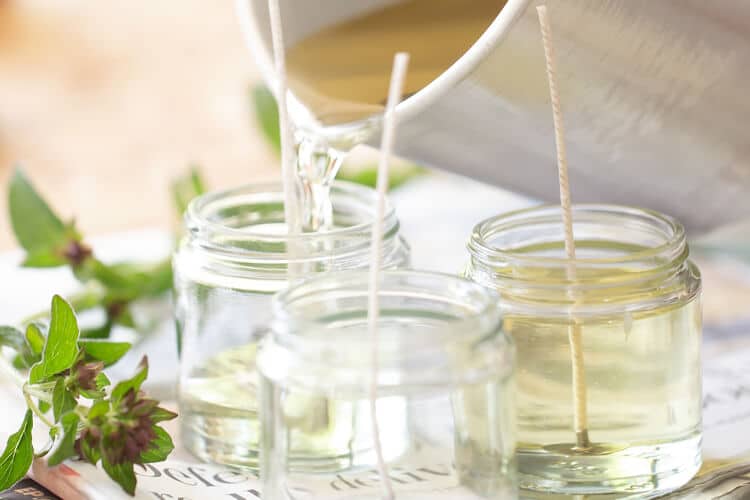
- 4) Rough Bulk
After adding the scent and color you want to the melted wax, let this mixture cool a bit. Make sure to center the wick before pouring the mixture in your hand into your container. You can hold the end of the wick so that the wick does not remain, or you can fix your wick with the help of a latch.
Then slowly pour the mixture into the bowl and wait for the wax to harden for a few hours. After it hardens, you can cut off the outer part of the wick. It will be sufficient to cut the wick 1 or 1.5 cm above the surface of the candle. Then wait 24 hours and your handmade candle is ready!
If the perfectly smooth surface and the color intensity you want are not the case, do not be upset. As your experiences increase, you will achieve excellent results. Be careful when removing the candles you make for decorative purposes from their molds, because they can break. If you wish, you can decorate the candles you make with different beads, glitter and small objects. You can show everyone your creativity and personal tastes with your candles.
What is Yin Yang Philosophy? How does it apply to daily life?